Friday, January 22, 2016

Your First Test with Android Testing Framework

In this article, you will start with your first Android Testing. To guarantee quality of your Android application, you should follow the procedure below
  1. Design test specification
  2. Develop test program
  3. Execute test case on target device
  4. Collect test result
Android application testing procedure

STEP 1) Design test specification

  • This is the first step to test your application.In this step you Define target to be test. In your Android application, there's many targets need to be tested such as UI, Activity, components, services. Clearly defining the target in your application will help achieve wide test coverage.
  • Plan the test types should be conducted (Unit test, Functional test, System test).
  • Design test cases for maximum coverage but minimize number of test cases. The more code is tested more are chances of early bug detection.

STEP 2) Write TEST program

This section guides you how to write an Android test program using Android JUnit Test and Robotium. Assume that you have already developed an Android program name HelloAndroid. This program has some functions described below:
  • Display a text "Hello world!" on screen.
  • Display a message HelloAndroid when user press "Start" button
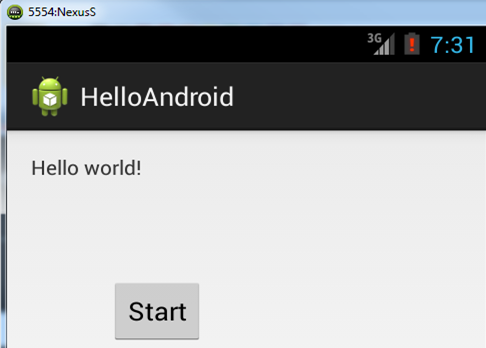
HelloAndroid Application

System Requirements

  • Android platform comes with pre-integrated JUnit 3.0 framework.
  • In order to create Android Test Project from Eclipse, your computer must have installed:
    • Latest version Android Platform (currently Android 4.2.2)
    • Eclipse ADT plug-in (latest version is ADT  22.0.4)
You can download Eclipse IDE with built-in ADT (Android Developer Tools). It includes the essential Android SDK components and a version of the Eclipse IDE .
For the Robotium testing framework, you need to down Robotium library from Robotium webpage.

Create Android Test Project

  • Click File -> New -> Other
  • Choose: Android -> Android Test Project as per below figure -> Choose Next
Create new Android test project
Write name of your test project. As naming convention, your test project should be name "HelloAndroidTest"
Add test project name base on naming convention
Choose target application under test. In this case, this is HelloAndroid click Finish
Choose target application under test

Create Test Suites

Base on your test specification, you started to create test suites for your test program. You can choose various Testing framework. In this tutorial, I choose standard Android testing frameworkActivityInstrumentationTestCase2.  You have to add Robotium library file to a libs directory in your project folder in case you want to test with Robotium framework. (You create lib folder in your project folder).
A test case defines the fixture to run multiple tests. To define a test case, you must follow the program structure below:
  • Implement a subclass of TestCase.
  • Define instance variables that store the state of the fixture
  • Initialize the fixture state by overriding setUp()
  • Clean-up after a test by overriding tearDown().
Test program's structure

Adding Test Cases

  • In the same package with TestSuite, we create TestCase classes
  • To test certain activity i.e. HelloAndroid, create a test case extentActivityInstrumentationTestCase2
  • In this class, tester can obtain testing activity through getActivity() method .
  • You can  freely create test for a testing activity by create method with name "test + original Method Name"
  • In test method, tester can use Android JUnit function to compare the actual value and expected value. These methods are shown in below.
Example methods of Robotium and Android Testing framework
These test suites above verified that Application GUI must display a text "Hello World!", and contains a button name "Start".

STEP 3) Run Test

After you finish writing your test program, run the test using the steps below
  • Connect Android device to your PC (or start Emulator in case you don't have real device).
  • In your IDE, right click àRun asàAndroid Unit Test
Running test program
Besides running test on IDE, you can run test on command line. In this test program, test package iscom.example.helloandroid.test . In Linux  terminal, you can use following command to run all test in this package:
$ adb shell am instrument -w -e package com.example.helloandroid.test

STEP 4) Get test result

After test executes, you get test results .
In this test program, 4 test methods are executed.  In this case, all test cases are passed.
Test result output in case all test cases passed
In case test case fails, the output is display and show you which test cases failed
Test result output in case all test cases failed

Source code examples

This articles include some Source Code examples which help you to understand the tutorial more clearly and quickly catch up the technical knowledge

Complete Guide to Android Testing & Automation

Android is the largest operating system in the world. At the same time, Android is fragmented. there are tons of devices and Android versions that your app must be compatible with

Why Android Testing?

Android is the largest operating system in the world. At the same time, Android is fragmented. there are tons of devices and Android versions that your app must be compatible with.
It doesn't matter how much time you invest  in design and implementation , mistakes are inevitable, and bugs will appear.

Myths of Android Testing

Many enterprises develop android testing strategies that are based on common misconceptions. This section examines a few popular myths and realities of Android testing.
Myth #1:All Android devices are the same... test on emulators is enough
Let's start with a simple example. An application works perfectly on emulator s but on some real devices, it crashes during execution
Application crashes during execution on real device
Emulators are not sufficient for your mobile testing. You must test your app on real devices.
Myth #2:Testing on some common devices is enough
  • On different devices, your application looks different because different devices have different hardware, screen sizes, memory etc. You must test your application on different devices, OS versions, carrier networks and locations.
Myth#3:Exploratory testing just before launch is enough
  • Generally in all testing, we design the test cases then execute them. But in Exploratory testing, test design and execution all will be done together.
  • In exploratory testing, there's no plan and no preparation, then tester would do tests that he wants to do. Some functions will be tested repeatedly, while some functions will not be tested altogether.
Myth#4:If there some bugs in application, users will understand
  • If application doesn't work and has bugs, users uninstall your app
  • Quality issues are the first reason for bad review in Google Play. It affects to your reputation and you lose customer's trust.
Therefore its essential to have a proper android testing strategy in place

Android Testing Strategy

A correct android testing strategy should include the following
  1. Unit Test
  2. Integration Test
  3. Operational Test
  4. System Test

Unit tests

Unit Tests include sets of one or more programs which are designed to verify an atomic unit of source code, such as a method or a class.
Android platform comes pre-integrated JUnit 3.0 framework. It's open source framework for automating unit testing. Android Testing Framework is powerful tool for developer to write the effective unit test program.
The integration of Android and JUnit framework
An addition to Unit testing is User Interface (UI) tests. These tests relate to UI components of your target application. UI tests ensure that your application return the correct UI output in response to sequence of user actions on device.
Common user UI actions on application
The common way to performance UI tests on device is Android Instrumentation. But this has performance issues. One of the best tools to conduct UI testing on Android is Robotium .

Integration tests

In integration testing, all unit tested modules, are combined and verified. In Android, integration tests often involve checking integration withAndroid components such as Service testing, Activity testing, Content Provider testing, etc
Types of integration test on Android
There's many testing frameworks are used to conduct integration test for Android such as Troyd, Roboelectric, Robotium.

Operational tests

  • Operational are also called Functional Tests or Acceptation Tests. They are high level tests designed to check the completeness and correctness of application.
  • In Android, FitNesse is open-source framework that makes it easy to conduct operational tests for target application.

System tests

In System testing the system is tested as a whole and the interaction between the components, software and hardware is checked.
In Android, system testing normally includes
  • GUI tests
  • Usability tests
  • Performance tests
  • Stress tests
In the above list, performance testing is given more focus. You can use tools like Traceview to conduct performance test on Android .This tool can help you debug your application and profile its performance.

Automated ANDROID TESTING

As android is fragmented, testing on multitude of devices is necessary. But this will also cost you money. Automated Android Testing can help reduce costs.

Benefits ofautomated android testing
  • Reduce time for executing test cases
  • Increase productivity of your development process
  • Early bug detection, save cost on software maintenance
  • Quickly found and fix the bugs on implementation
  • Ensure the quality of software
We will study the following 3 frameworks
  • Android Testing framework
  • Robotium Testing framework
  • Roboelectric Testing framework

Android testing framework

One of the standard testing frameworks for Android application is Android testing framework. It is a powerful and easy-to-use testing framework that is well integrated with the Android SDK tools.
 Android testing framework Architecture
  1. Application package is your target application which needs to be tested
  2. InstrumentationTestRunner is the test case runner that executes test case on target application. It includes:
         2a)  Test tools: A SDK tools for building test. They are integrated in Eclipse IDE or run as command line.
         2b)  MonkeyRunner: A tool that provides APIs for writing program which control an Android device or emulator outside of Android code.
  1. Test package are organized into test projects. This package follows naming convention. If the application under test has a package name of "com.mydomain.myapp"  than Test package should be "com.mydomain.myapp.test" .Test package includes 2 objects as below:
         3a)  Test case classes:include test methods to executed on target application.
         3b)  Mock objects : includes mock data that will be used as sample input  for test cases.

Android Test Case Classes

AndroidTestCase class diagram
  1. TestCase  includes JUnit methods to run JUnit test
  2. TestSuite is used to run set of test cases
  3. InstrumentationTestSuite is a TestSuite that injects Instrumentation into InstrumentationTestCase before running them.
  4. InstrumentationTestRunner is the test case runner that execute test case on target application.
  5. AndroidTestCase extends JUnit TestCase. It contains methods for accessing resources like Activity Context.
  6. ApplicationTestCase verifies the Application classes in a controlled environment.
  7. InstrumentationTestCase verifies a particular feature or behavior of target application , for e.g., verify UI output of application.
  8. ActivityTestCase is base class that supports testing the Application Activities.
  9. ProviderTestCase is class for testing single ContentProvider.
  10. ServiceTestCase is used to test Service classes in testing environment. It also supports Service's life cycle.
  11. SingeLauchActivityTestCase is used to test single Activity with an InstrumentationTestCase.
  12. ActivityUnitTestCase  is used to test single isolated activity.
  13. ActivityInstrumentationTestCase2 extends the JUnit TestCase class. It connects you to target application with instrumentation. With this class, you can access application's GUI component and send UI event (keystroke or touch event) to the UI.
Below is an example of ActivityInstrumentationTestCase. It verifies the UI operation of Calculator application, check the correctness of the UI outputs.
ActivityInstrumentationTestCase2 testing example

Robotium testing framework

Standard Android testing framework has some limitation as below
  • Unable to handle multiple activities
  • Test execution performance is slow
  • Test cases are complex & hard to implement
Robotiumframework is the better choice to conduct testing on Android application
Robotium is open source framework and is considered an extension of Android test framework. Using Robotium, developer can create robust automatic GUI test cases for Android applications. Moreover, developer can write functional, system and acceptance test scenarios, spanning multiple Android activities.
Advance features of Robotium

Robotium Test Case Classes

Robotium uses set of classes (com.jayway.android.robotium.solo) for testingThis class supports test cases that span over multiple activities. Solo is integrated with the ActivityInstrumentationTestCase2.
Integration Robotium and ActivityInstrumentationTestCase2
Tester can write test cases without knowledge of application design (black box testing) by using Robotium test case classes. It is an outstanding feature compare to Android test case classes.
To use Robotium in your Android test project, you need follow the steps below
Using Robotium to conduct testing on Android application

Roboelectric testing framework

Testing using Android Testing framework with device or emulator is difficult. Building and running test is slow and take much development effort. To fix this problem, there's another choice - Roboelectric testing framework.
Roboelectric framework allows you to run Android tests directly on JVM without the need for a device or an emulator.
Advance features of Roboelectric

Roboelectric Test Case Classes

Operation of Roboelectric
  • As shown above, Roboelectric can perform following actions:
  • Register and create a Shadow class
  • Intercept the loading of Android class
  • Uses javaassist to override the method bodies of Android class
  • Bind Shadow object to Android class
  • This allows the code under test to execute without Android environment.

Others testing framework

  • Besides testing frameworks which were mentioned above, there are many other testing frameworks such as:
  • Calculon, a Java DSL for Android Activity Testing which runs on Dalvik Virtual Machine
  • Android Mock, a framework for mocking interfaces and classed on Dalvik VM
  • Roboguide, a dependency injection in Android application
  • Android Junit Report, a custom instrumentation test runner for Android that generates XML reports for integration with other tools.

Best practices in Android Testing

  • Application developers should create the test cases at the same time when they are writing the code
  • All test cases should be stored in version control-together with source code
  • Use continuous integration and run tests every time the code is changed
  • Avoid using emulators and rooted devices

Real Device Vs Emulator Testing: Ultimate Showdown

Real Testing Device:  Testing on real device allows you to run your mobile applications and checks its functionality. Real device testing assures you that your application will work smoothly in customer handsets.
Emulators: Emulator is a software program that allows your mobile to imitate the features of another computer or mobile software you want them to imitate by installing them to your computer or Mobile.

Difference between the emulator and simulator based testing:

Both Emulators and Simulators are virtual devices. A virtual device is not the real phone but software which gives same functionality as the real phone (except few functionality like the camera).
The simulator based testing
The emulator based testing
Simulator's objective is to simulate the internal state of an object as close as possible to the internal state of an object.
The emulator aims at emulating or mimicking as close as possible the outer behavior of an object
Simulators are preferable whenever the testing team needs to test the mobile's external behavior like calculating, making transactions and so forth.
Emulators are preferable whenever the testing team needs to test the mobile's internal behavior like its internal hardware, firmware and so forth.
Simulators are written in high level languages.
Emulators are written in machine-level assembly languages.
The simulators can be difficult in terms of debugging purpose.
Emulators are more suitable when it comes to debugging purpose
A simulator is just a partial re-implementation of the original software .
Often an emulator comes as a complete re-implementation of the original software .


Relative Advantages of real device-based application and emulator/simulator based testing


Issue
Emulator Testing
Real Device Testing
Situation-based application
There are specific situations where the deadline to produce text execution results are short and purchasing the required mobile devices may be not possible. Thereby it might be necessary to use the emulator/simulator in these circumstances for testing the relevant mobile applications which need to be tested.

The real device allows the testers to test almost all the real time scenarios which can be tested for the mobile applications. These devices are operated using fingers and simulate real-life usage. They also help in situation Real context: is it easy to use the app on the train, or while walking down the street? The situation about in bright sunlight or in the rain?
Feeling of closeness towards the real handheld devices
The wide gamut of mobile devices creates the problems, whereby the testers are not confident about which mobile devices to invest in for testing, considering the budget constraints. Emulator/simulator (s) is tailor made for this type of situation(s).
The real device allows the testers to test even usability issues like the look and feel of the application, color resolution of the screen, whether the picture is bright or not under both day and night conditions and so on.
Ease of availability
Emulator/simulator(s) are in most cases open and free software which can be very easily downloaded from Internet and ready to be tested for.
The real devices allow stringent performance testing issues like working with a real time transport application for 15 hours continuously which cannot be successfully simulated by the emulators.
Ease of opening an Web application through URL
It is easier to do web application testing when it comes to opening the web application. The user just needs to copy and paste the application URL.
Testing on real devices provides more in terms of reliability.
Capturing screenshots of the situations where defects appear
Capturing issue of screenshots over simulator is very easy with the simulator since we just need to use Microsoft office facilities.
Testing with real world devices is very helpful in terms of interoperability testing.
Simulation of validation of battery scenarios
The emulator/simulators are not able to simulate the battery issues.
Real world devices can easily perform the same.
Validation of incoming interrupts
The emulator/simulators are not able to simulate the incoming interrupts for SMS as well as the incoming calls.
Real world devices can easily simulates incoming interrupts.
Validation of exact color displays
The emulator/simulator is not able to properly emulate/simulate the exact color display of the devices when the real device is in sunlight or in black.
Real world devices can easily simulates the exact color displays.
Validation of the performance
The performance of the emulator/simulator tends to be slower than the original devices at times.
The original devices tend to perform faster than the emulator or the simulators.
Simulating memory related issues
The memory available at the emulator/simulator tends to be far more than the real devices so this may create misconception for the users who would be using the same validations.
The memory storage level of the devices tend to be far less than the emulators thus it may

Disadvantages of Simulators and Real device

Emulators/ Simulators
Real Device
The emulator/simulator is not always the best type of solution for scenarios such as the ones whereby the testing team needs to validate the performance of the application for a longer period of time.
The real devices are costly compared to the emulator/simulators. Thereby projects under budget and timeline constraints may risk profitability as well as the viability of the overall project.
The emulator/simulator is suitable mostly for certain types of functional test case executions.
There is a very wide variety of mobile devices from apple to Samsung to android and to Symbian and so on. Considering this wide range of mobile devices it is very hard for the testing team to arrange all sorts of mobile devices while working under considerable amount of budget and timeline related constraints.
The emulator/simulator can some time not be supportive of certain types of application and in these cases the testing team may need to purchase software patches which may not always be free but could be costly at times.
Real Mobile devices when used in the developing stage for unit testing and similar purposes could turn out to be harder to connect to the IDE than the emulators and this causes tremendous problems for debugging and in a project with timeline constraints this may very well hamper the overall conclusion of the project.
Not all the emulator/simulator supports the complete gamut of mobile applications. For example the bada simulator supports the Maemo (such as Nokia N900), Symbian Touch (such as Nokia N8) and Symbian non-touch (such as Nokia E71) but it does not support other mobile devices like Android. As per as the application testing functionalities are concerned, bada does not support direct web browsing testing but it allows the user to test and create only webapps and widgets.
In order to test with the real world devices, the devices need to be always connected to the USB port of the machines. So if the USB ports are not working properly, the testing would not be possible. Without providing adequate security measures mobile devices (if they happen to be costly like the apple Iphone) may be lost or stolen thus hampering the overall effort. Increasing security may also go on to increase the overall expenditure involved with the project.
 
The user has to type manually the URL for opening up the web application which is needed to be tested. To solve this particular issue, the tester may need to create phone bookmarks, short URL services or sending URLs to mobile using Bluetooth connection or creating the webpage that contains some URL-s. The adoption of these procedures would ensure that a lot of very important memory space may be eaten up thus impacting on the overall performance of the application.

Conclusion

Considering the significant role the mobile applications is playing nowadays play now days in our day to day life, testing of these applications are going to evolve and thus they require a lot of testing to make them work as required.Testing in both the simulator/emulator as well as the real world devices is necessary to maintain strong standards and quality assurance.

Careful deliberation of both the pros and cons of mobile emulators and real devices, it would be worthwhile to reach at the conclusion that the optimal mobile testing solution for enterprises is neither putting all the eggs into the basket of the real devices nor putting them into the emulator but rather what we need is an optimum combination of both.
Emulators can be considered as very suitable for the initial stages of application development.
However, to avoid the costly scenario of releasing a business-critical application with defects, enterprises need to ensure that they perform the major part of their mobile testing on real devices before the application goes into production.
Each organization needs to strategize and plan carefully to determine at what stage to introduce real devices, they also need to decide how many devices are sufficient to cover market needs, and what could be the best possible option to adopt for managing those devices.
Best practices would indicate that actual development should use emulators (and a few reference real handsets) in order to speed up the debugging of the application during the coding phase, while sanity, smoke testing, performance, interoperability and network feasibility and regression testing should be done on real handsets.
It is also an emerging practice to ensure that the developers use the emulator for fast execution during the development phase whereas then the testing team should test with the real device during the testing phase in order to ensure overall quality assurance goals and targets.To save on cost, they can consider using Virtual Mobile Testing tools. These services offer developer to test their application on wide variety of handsets using different mobile networks geographically located throughout the world (useful for applications using GPS). Such services are offered on hourly basis and are very cost effective compared to buying new phones.

Mobile Testing: Complete Guide to Test your Mobile Apps

Some or all of the following testing types may be performed depending on your mobile testing requirements 


  • Functional testing
  • Performance testing
  • Security testing
  • Usability testing
  • Compatibility testing
  • Recoverability Testing

Functional testing:

The functional testing of Mobiles normally consists in the areas of testing user interactions as well as testing the transactions. The various factors which are relevant in functional testing are
  1. Type of application based upon the business functionality usages (banking, gaming, social or business)
  2. Target audience type (consumer, enterprise, education)
  3. Distribution channel which is used to spread the application (e.g. Apple App Store, Google play, direct distribution)
The most fundamental test scenarios in the functional testing can be considered as :
  1. To validate whether all the required mandatory fields are working as required.
  2. To validate that the mandatory fields are displayed in the screen in a distinctive way than the non-mandatory fields.
  3. To validate whether the application works as per as requirement whenever the application starts/stops.
  4. To validate whether the application goes into minimized mode whenever there is an incoming phone call. In order to validate the same we need to use a second phone, to call the device.
  5. To validate whether the phone is able to store, process and receive SMS whenever the app is running. In order to validate the same we need to use a second phone to send sms to the device which is being tested and where the application under test is currently running.
  6. To validate that the device is able to perform required multitasking requirements whenever it is necessary to do so.
  7. To validate that the application allows necessary social network options such as sharing, posting and navigation etc.
  8. To validate that the application supports any payment gateway transaction such as Visa, Mastercard, Paypal etc as required by the application.
  9. To validate that the page scrolling scenarios are being enabled in the application as necessary.
  10. To validate that the navigation between relevant modules in the application are as per the requirement.
  11. To validate that the truncation errors are absolutely to an affordable limit.
  12. To validate that the user receives an appropriate error message like “Network error. Please try after some time” whenever there is any network error.
  13. To validate that the installed application enables other applications to perform satisfactorily, and it does not eat into the memory of the other applications.
  14. To validate that the application resumes at the last operation in case of a hard reboot or system crash.
  15. To validate whether the installation of the application can be done smoothly provided the user has the necessary resources and it does not lead to any significant errors.
  16. To validate that the application performs auto start facility according to the requirements.
  17. To validate whether the application performs according to the requirement in all versions of Mobile that is 2g, 3g and 4g.
  18. To perform regression testing to uncover new software bugs in existing areas of a system after changes have been made to them. Also rerun previously performed tests to determine that the program behavior has not changed due to the changes.
  19. To validate whether the application provides an available user guide for those who are not familiar to the app

Performance testing:

This type of testing’s fundamental objective is to ensure that the application performs acceptably under certain performance requirements such as access by a huge number of users or the removal of a key infrastructure part like a database server.
The general test scenarios for performance testing in a Mobile application are:
  1. To determine whether the application performs as per the requirement under different load conditions.
  2. To determine whether the current network coverage is able to support the application at peak, average and minimum user levels.
  3. To determine whether the existing client-server configuration setup provides the required optimum performance level.
  4. To identify the various application and infrastructure bottlenecks which prevent the application to perform at the required acceptability levels.
  5. To validate whether the response time of the application is as per as the requirements.
  6. To evaluate product and/or hardware to determine if it can handle projected load volumes.
  7. To evaluate whether the battery life can support the application to perform under projected load volumes.
  8. To validate application performance when network is changed to WIFI from 2G/3G or vice versa.
  9. To validate each of the required the CPU cycle is optimization
  10. To validate that the battery consumption, memory leaks, resources like GPS, Camera performance is well within required guidelines.
  11. To validate the application longevity whenever the user load is rigorous.
  12. To validate the network performance while moving around with the device.
  13. To validate the application performance when only intermittent phases of connectivity is required.

Security testing:


The fundamental objective of security testing is to ensure that the application’s data and networking security requirements are met as per guidelines.
The following are the most crucial areas for checking the security of Mobile applications.

  1. To validate that the application is able to withstand any brute force attack which is an automated process of trial and error used to guess a person’s username, password or credit-card number.
  2. To validate whether an application is not permitting an attacker to access sensitive content or functionality without proper authentication.
  3. To validate that the application has a strong password protection system and it does not permit an attacker to obtain, change or recover another user’s password.
  4. To validate that the application does not suffer from insufficient session expiration.
  5. To identify the dynamic dependencies and take measures to prevent any attacker for accessing these vulnerabilities.
  6. To prevent from SQL injection related attacks.
  7. To identify and recover from any unmanaged code scenarios.
  8. To ensure whether the certificates are validated, does the application implement Certificate Pinning or not.
  9. To protect the application and the network from the denial of service attacks.
  10. To analyze the data storage and data validation requirements.
  11. To enable the session management for preventing unauthorized users to access unsolicited information.
  12. To check if any cryptography code is broken and ensure that it is repaired.
  13. To validate whether the business logic implementation is secured and not vulnerable to any attack from outside.
  14. To analyze file system interactions, determine any vulnerability and correct these problems.
  15. To validate the protocol handlers for example trying to reconfigure the default landing page for the application using a malicious iframe.
  16. To protect against malicious client side injections.
  17. To protect against malicious runtime injections.
  18. To investigate file caching and prevent any malicious possibilities from the same.
  19. To prevent from insecure data storage in the keyboard cache of the applications.
  20. To investigate cookies and preventing any malicious deeds from the cookies.
  21. To provide regular audits for data protection analysis.
  22. Investigate custom created files and preventing any malicious deeds from the custom created files.
  23. To prevent from buffer overflows and memory corruption cases.
  24. To analyze different data streams and preventing any vulnerabilities from these.

Usability testing:

The usability testing process of the Mobile application is performed to have a quick and easy step application with less functionality than a slow and difficult application with many features. The main objective is to ensure that we end up having an easy-to-use, intuitive and similar to industry-accepted interfaces which are widely used.
  1. To ensure that the buttons should have the required size and be suitable to big fingers.
  2. To ensure that the buttons are placed in the same section of the screen to avoid confusion to the end users.
  3. To ensure that the icons are natural and consistent with the application.
  4. To ensure that the buttons, which have the same function should also have the same color.
  5. To ensure that the validation for the tapping zoom-in and zoom-out facilities should be enabled.
  6. To ensure that the keyboard input can be minimized in an appropriate manner.
  7. To ensure that the application provides a method for going back or undoing an action, on touching the wrong item, within an acceptable duration.
  8. To ensure that the contextual menus are not overloaded because it has to be used quickly.
  9. To ensure that the text is kept simple and clear to be visible to the users.
  10. To ensure that the short sentences and paragraphs are readable to the end users.
  11. To ensure that the font size is big enough to be readable and not too big or too small.
  12. To validate the application prompts the user whenever the user starts downloading a large amount of data which may be not conducive for the application performance.
  13. To validate that the closing of the application is performed from different states and verify if it re-opens in the same state.
  14. To ensure that all strings are converted into appropriate languages whenever a language translation facility is available.
  15. To ensure that the application items are always synchronized according to the user actions.
  16. To ensure that the end user is provided with a user manual which helps the end user to understand and operate the application who may be not familiar with the application’s proceedings
Usability testing is normally performed by manual users since only human beings can understand the sensibility and comfort ability of the other users.

Compatibility testing:

Compatibility testing on mobile devices is performed to ensure that since mobile devices have different size, resolution, screen, version and hardware so the application should be tested across all the devices to ensure that the application works as desired.
The following are the most prominent areas for compatibility testing.
  1. To validate that the user Interface of the application is as per the screen size of the device, no text/control is partially invisible or inaccessible.
  2. To ensure that the text is readable for all users for the application.
  3. To ensure that the call/alarm functionality is enabled whenever the application is running. The application is minimized or suspended on the event of a call and then whenever the call stops the application is resumed.

Recoverability Testing

  1. Crash recovery and transaction interruptions
  2. Validation of the effective application recovery situation post unexpected interruption/crash scenarios.
  3. Verification of how the application handles a transaction during a power failure (i.e. Battery dies or a sudden manual shutdown of the device)
  4. The validation of the process where the connection is suspended, the system needs to re-establish for recovering the data directly affected by the suspended connection.
Other Important Checks:
  1. Installation testing (whether the application can be installed in a reasonable amount of time and with required criterion)
  2. Uninstallation testing (whether the application can be uninstalled in a reasonable amount of time and with required criterion)
  3. Network test cases (validation of whether the network is performing under required load or not, whether the network is able to support all the necessary applications during the testing procedures)
  4. Check Unmapped keys
  5. Check application splash screen
  6. Continued keypad entry during interrupts and other times like network issues
  7. Methods which deal with exiting the application
  8. Charger effect while an application is running in the background
  9. Low battery and high performance demand
  10. Removal of battery while an application is being performed
  11. Consumption of battery by application
  12. Check Application side effects

Ethical hacking step by step tutorial.

here are the links for all tutorials.


Evil Twin attack

Evil Twin Attack is attack is frequently carried upon wireless access points with malicious intentions. This attack happens when...